Schedule Reports
Reports may be scheduled for automated processing on the Reports – Schedule Reports page.
To schedule a report, follow these steps:
1. Security must be added giving access to OP – Report Generator (delete/add/edit/view) and no other access. Please note the access should be assigned to the user that will be running the automated reports.
2. Before establishing a schedule, define a report template with all report parameters defined as detailed in the previous section from the Generate Reports page.
3. Select Reports – Schedule Reports.
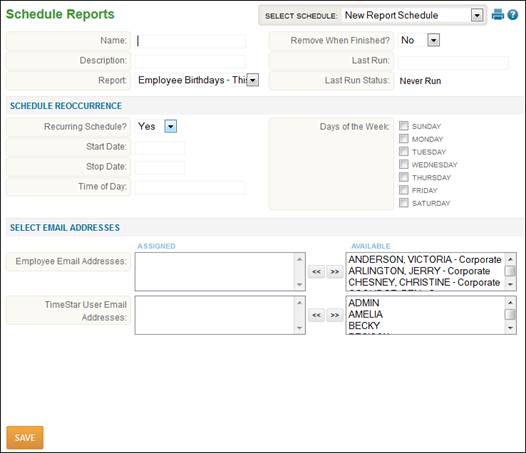
4. If scheduled reports already exist in the system, select the ‘Add’ button. If no scheduled reports have been established yet, the blank page shown above will display.
5. Enter the schedule ‘Name’ and ‘Description’.
6. Select the Report template to generate.
7. Define Schedule Recurrence options.
a. Set Recurring Schedule to ‘No’ to generate the report only once.
b. Set Recurring Schedule to ‘Yes’ to generate the report a number of times.
c. Enter the date to begin generating the report.
d. If applicable, enter the date to stop generating the report.
e. Define the time of day to generate the report.
f. Define the days of the week to generate the report.
g. Set ‘Removed when finished’ to ‘Yes’ to no longer list the report as scheduled in the system after it is generated once.
h. Set ‘Removed when finished’ to ‘No’ to leave the report schedule active.
8. Select E-mail Addresses.
a. Define employee and/or TimeStar™ user email addresses to send the report to at the scheduled time.
9. Click the ‘Save’ button.