Employee Update
The Employee Update page allows users to update employee assignments in the following areas of TimeStar™: accrual group, accrual plan, missing pay group, missing supervisor level, organization level, pay group, request workflow group, schedule group, secondary rate, and supervisor.
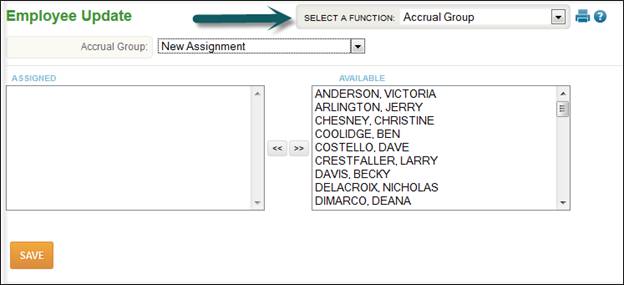
This procedure will assign a group of employees to an accrual group. The accrual group determines how the system calculates accrual transactions.
To perform the update, the following steps will need to be taken:
1. Select Global Update – Employee Update.
2. From the ‘Select a Function’ drop-down, select ‘Accrual Group’.
3. Select the accrual group to update employees with.
4. The available employees will be listed alphabetically on the right side of the screen. Select the employees to update by highlighting the employee’s name and click the arrows to move that record to the left side of the screen.
5. Click the ‘Save’ button.
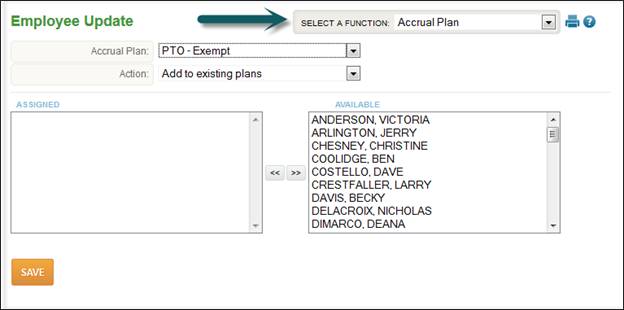
This procedure will assign a group of employees to an accrual plan. The accrual plan determines how the system calculates accrual transactions.
To perform the update, the following steps will need to be taken:
1. Select Global Update – Employee Update.
2. From the ‘Select a Function’ drop-down, select ‘Accrual Plan’.
3. Select the accrual plan to update employees with.
4. Select ‘Add to existing plans’ to add the plan to employees existing accrual plans. Select ‘Replace all existing plans’ to remove all existing assignments and add this accrual plan to employees.
5. The available employees will be listed alphabetically on the right side of the screen. Select those employees to update by highlighting the employee’s name and click the arrows to move them to the left side of the screen.
6. Click the ‘Save’ button.
This procedure will scan all of your employees to determine if employees are missing pay groups. You can also assign the employees missing a pay group on this screen.

To perform the update, the following steps will need to be taken:
1. Select Global Update – Employee Update.
2. From the ‘Select a Function’ drop-down, select ‘Missing Pay Group’.
3. Any employees missing a pay group will display on the right side of the screen.
4. If employees are showing in the list, select the pay group to update employees with.
5. Enter the start date for this assignment. The date will default to the first day of the current pay period.
6. Click the ‘Save’ button.
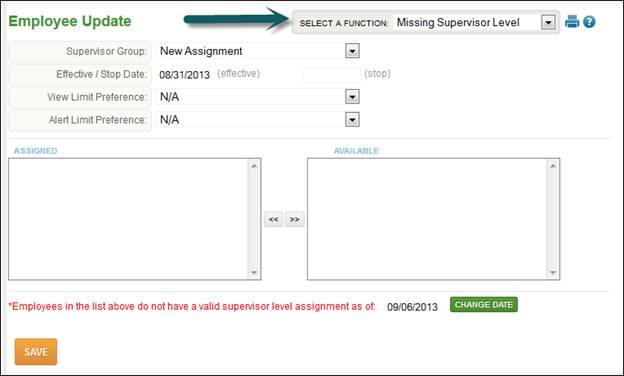
This procedure will scan all of your employees to determine if employees are missing supervisor groups. You can also assign the employees missing a supervisor group on this screen.
To perform the scan/update, the following steps will need to be taken:
1. Select Global Update – Employee Update.
2. From the ‘Select a Function’ drop-down, select ‘Missing Supervisor Level’.
3. Any employees missing a supervisor group will display on the right side of the screen.
4. If employees are showing in the list, select the supervisor group to update employees with.
5. Enter the start date for this assignment. The date will default to the first day of the current pay period.
6. Click the ‘Save’ button.
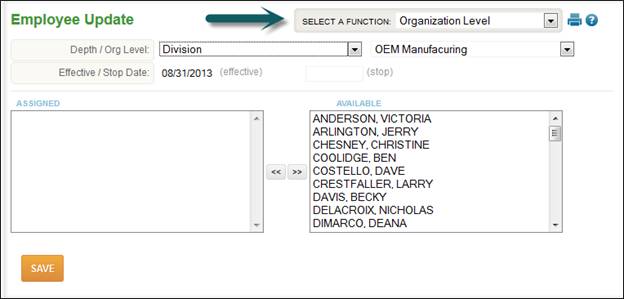
This procedure will assign an organization level item (i.e. department or location) to a group of employees.
To perform the update, the following steps will need to be taken:
1. Select Global Update - Employee Update.
2. From the ‘Select Maintenance Function’ drop-down, select ‘Organization Level’.
3. Select the ‘Depth’ to update employees with (i.e. Department)
4. Select the ‘Org Level’ to update employees with (i.e. Admin).
5. Enter the start date for this assignment. The date will default to the start date of the current pay period.
6. The available employees will be listed alphabetically on the right side of the screen. Select the employees to update by highlighting the employee’s name and click the arrows button to move them to the left side of the screen.
7. Click the ‘Save’ button.
This procedure will assign a group of employees to a pay group. The pay group that an employee is assigned to will determine how their hours worked are calculated.

To perform the update, the following steps will need to be taken:
1. Select Global Update – Employee Update.
2. From the ‘Select a Function’ drop-down, select ‘Pay Group’.
3. Select the pay group to update employees with.
4. Enter the start date for this assignment. The date will default to the first day of the current pay period.
5. The employees will be listed alphabetically on the right side of the screen. Select the employees to update by highlighting the employee’s name and click the arrows button to move them to the left side of the screen.
6. Click the ‘Save' button.
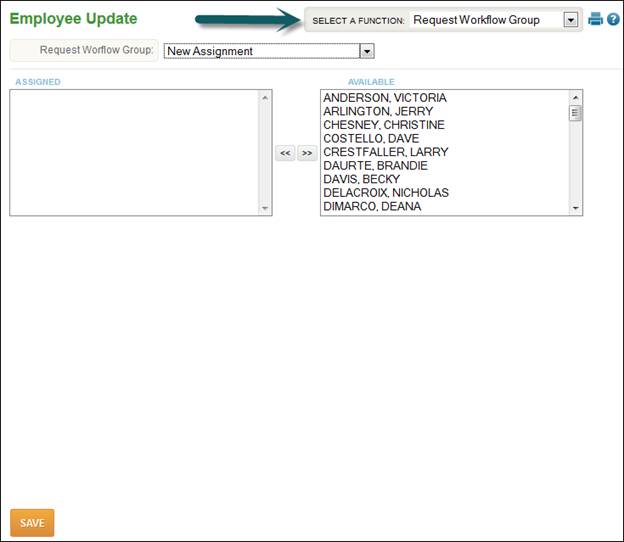
This procedure will assign a group of employees to a request workflow group. The request workflow group the employee is assigned to will determine the flow of each request type once a request has been submitted.
To perform the update, the following steps will need to be taken:
1. Global Update – Employee Update.
2. From the ‘Select a Function’ drop-down, select ‘Request Workflow Group’.
3. Select the Request Workflow Group to update employees with.
4. The employees will be listed alphabetically on the right side of the screen. Select the employees to update by highlighting the employee’s name and click the arrows button to move them to the left side of the screen.
5. Click the ‘Save’ button.
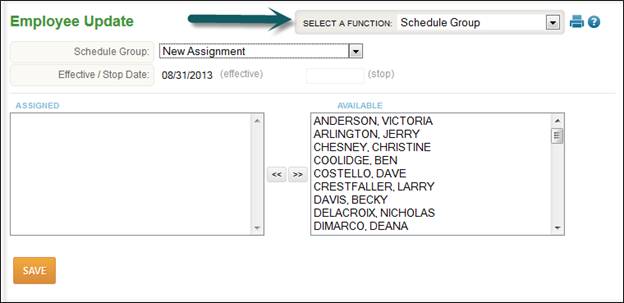
This procedure will assign a group of employees to a schedule group. The schedule group determines how the system reports on attendance transactions such as ‘early in’ or ‘tardy’.
To perform the update, the following steps will need to be taken:
1. Select Global Update – Employee Update.
2. From the ‘Select a Function’ drop-down, select ‘Schedule Group’.
3. Select the Schedule Group to update employees with.
4. Enter the start date for this assignment. The date will default to the start date of the current pay period.
5. The employees will be listed alphabetically on the right side of the screen. Select the employees to update by highlighting the employee’s name and click the arrows button to move them to the left side of the screen.
6. Click the ‘Save’ button.
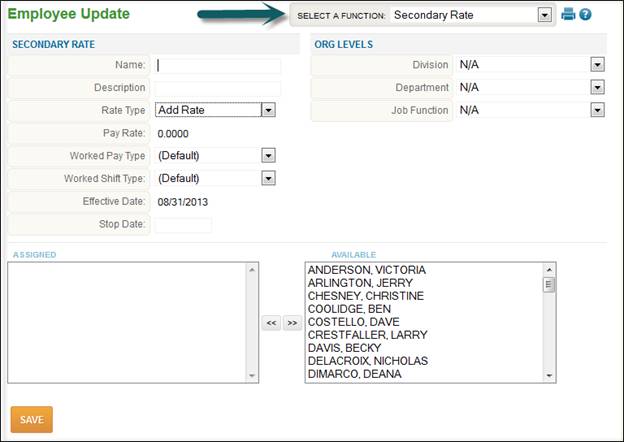
This procedure will assign a group of employees a secondary rate.
To perform the update, the following steps will need to be taken:
1. Select Global Update – Employee Update.
2. From the ‘Select a Function’ drop-down, select ‘Secondary Rate.
3. Enter the Name and Description of the Secondary Rate.
4. Select the rate type either Add Rate or Replace Rate.
5. Select the Worked Pay Type the rate should apply to.
6. Select the Worked Shift Type the rate should apply to.
7. Enter the Effective Date.
8. Select Org Levels to apply.
9. The employees will be listed alphabetically on the right side of the screen. Select the employees to update by highlighting the employee’s name and click the arrows button to move them to the left side of the screen.
10. Click the ‘Save’ button.
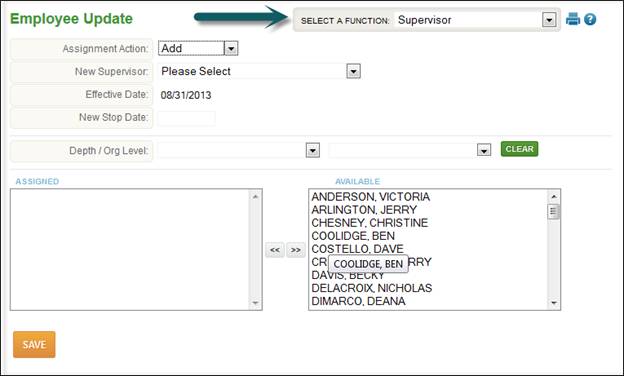
This procedure will maintain supervisor assignments for a group of employees.
To perform the update, the following steps will need to be taken:
1. Select Global Update – Employee Update.
2. From the ‘Select a Function’ drop-down, select ‘Supervisor’.
3. Select the ‘Assignment Action’.
a. Add: Specify a new assignment. Leave existing assignments unchanged.
b. Change: Specify a new assignment, stopping all current assignments (excluding those with the same effective date).
c. Delete: Choose an existing assignment and delete it.
d. Replace: Choose an existing assignment to stop, and specify a new assignment to replace it with.
e. Stop: Choose an existing assignment and stop it.
4. Select the supervisor to update employees with. Only valid supervisors will display. When the supervisor is updated, the employee list will be updated with possible valid assignments.
5. Enter the start date for this assignment. The date will default to the start date of the current pay period.
6. To stop an assignment, enter the stop date for the supervisor assignment.
7. To further filter the employee list, enter a depth and organization level item. After this filter is applied, to remove the filter, click the ‘Clear’ button.
8. The employees will be listed alphabetically on the right side of the screen. Select the employees to update by highlighting the employee’s name and click the arrows button to move them to the left side of the screen.
9. Click the ‘Save’ button.